See what needs attention.
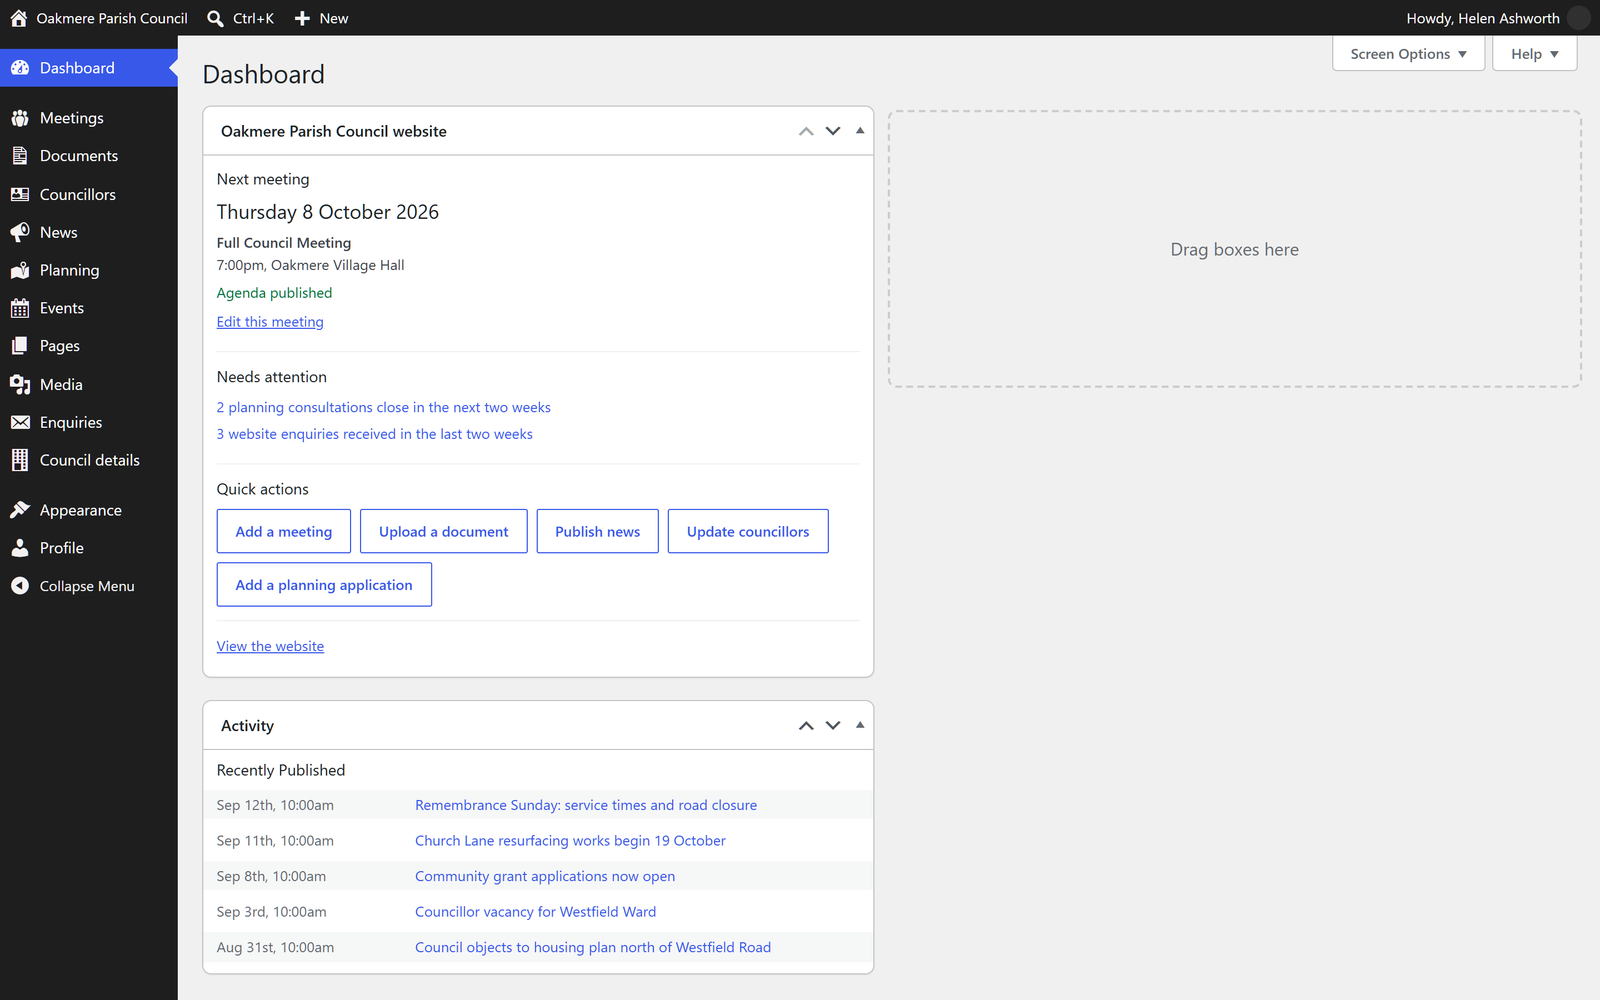
The dashboard brings together the next meeting, missing paperwork and quick publishing actions. The clerk sees the council tools they need.

The clerk’s side of the website
Four steps through the actual Oakmere editing screens. This is a screenshot walkthrough; it does not change the demonstration site.
The dashboard brings together the next meeting, missing paperwork and quick publishing actions. The clerk sees the council tools they need.
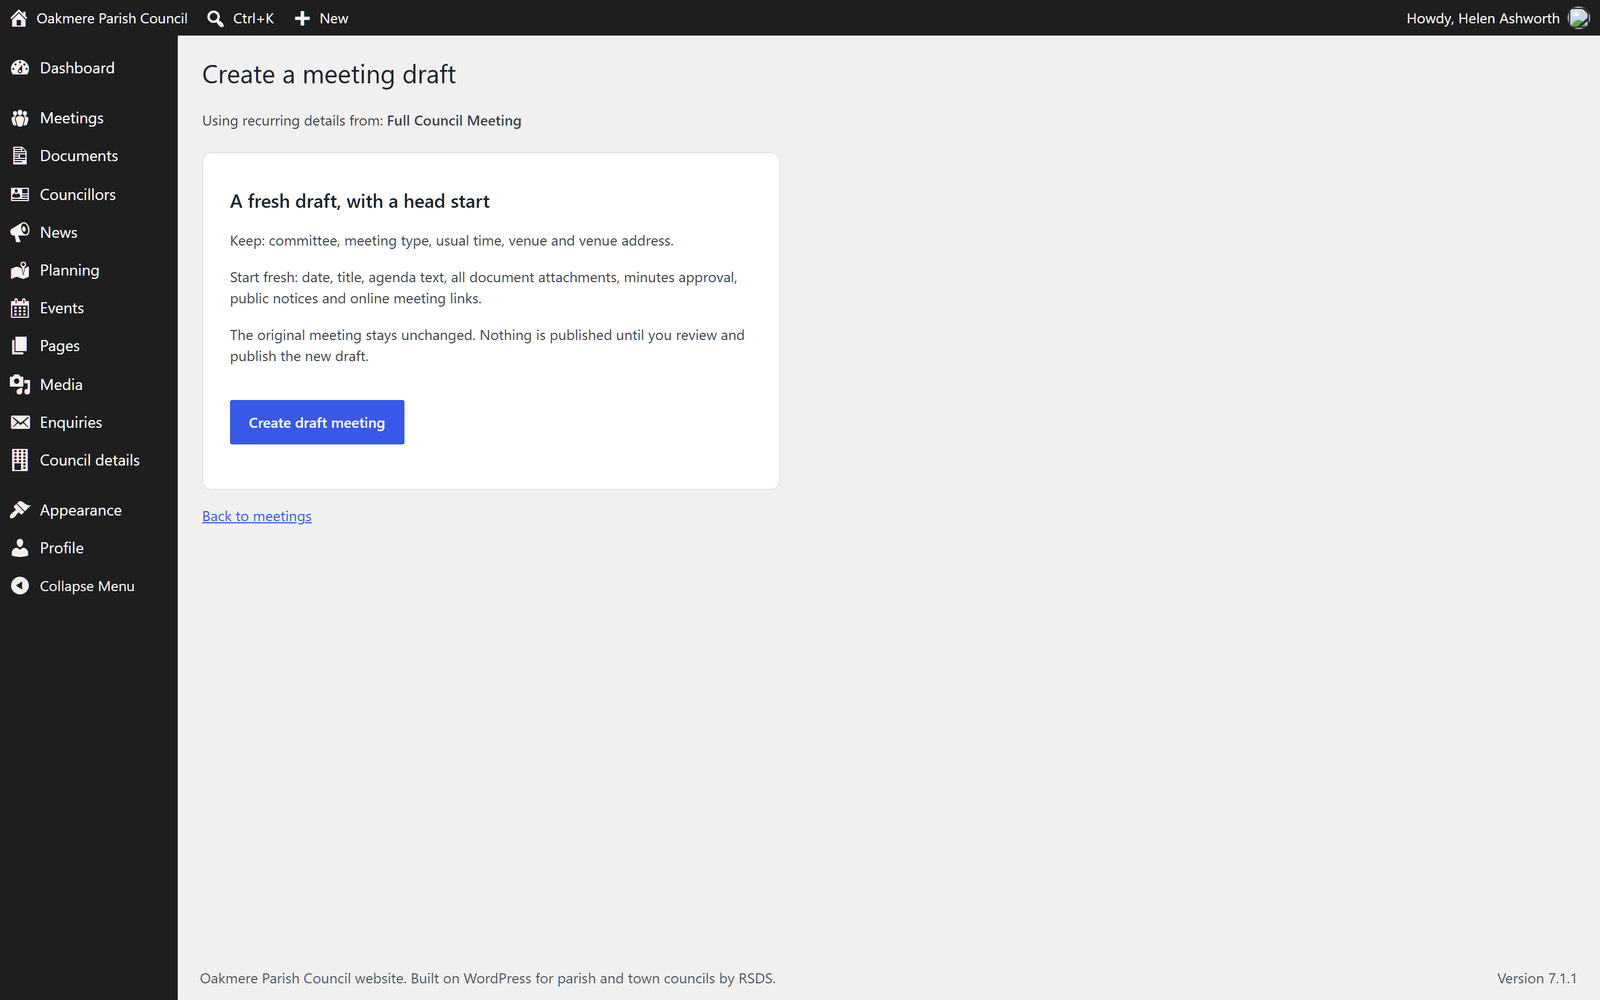
Choose “Use as template” beside a meeting. A confirmation explains exactly what carries over. Committee, venue and time are reused in a draft; the date, agenda, papers, minutes and public notices are cleared.
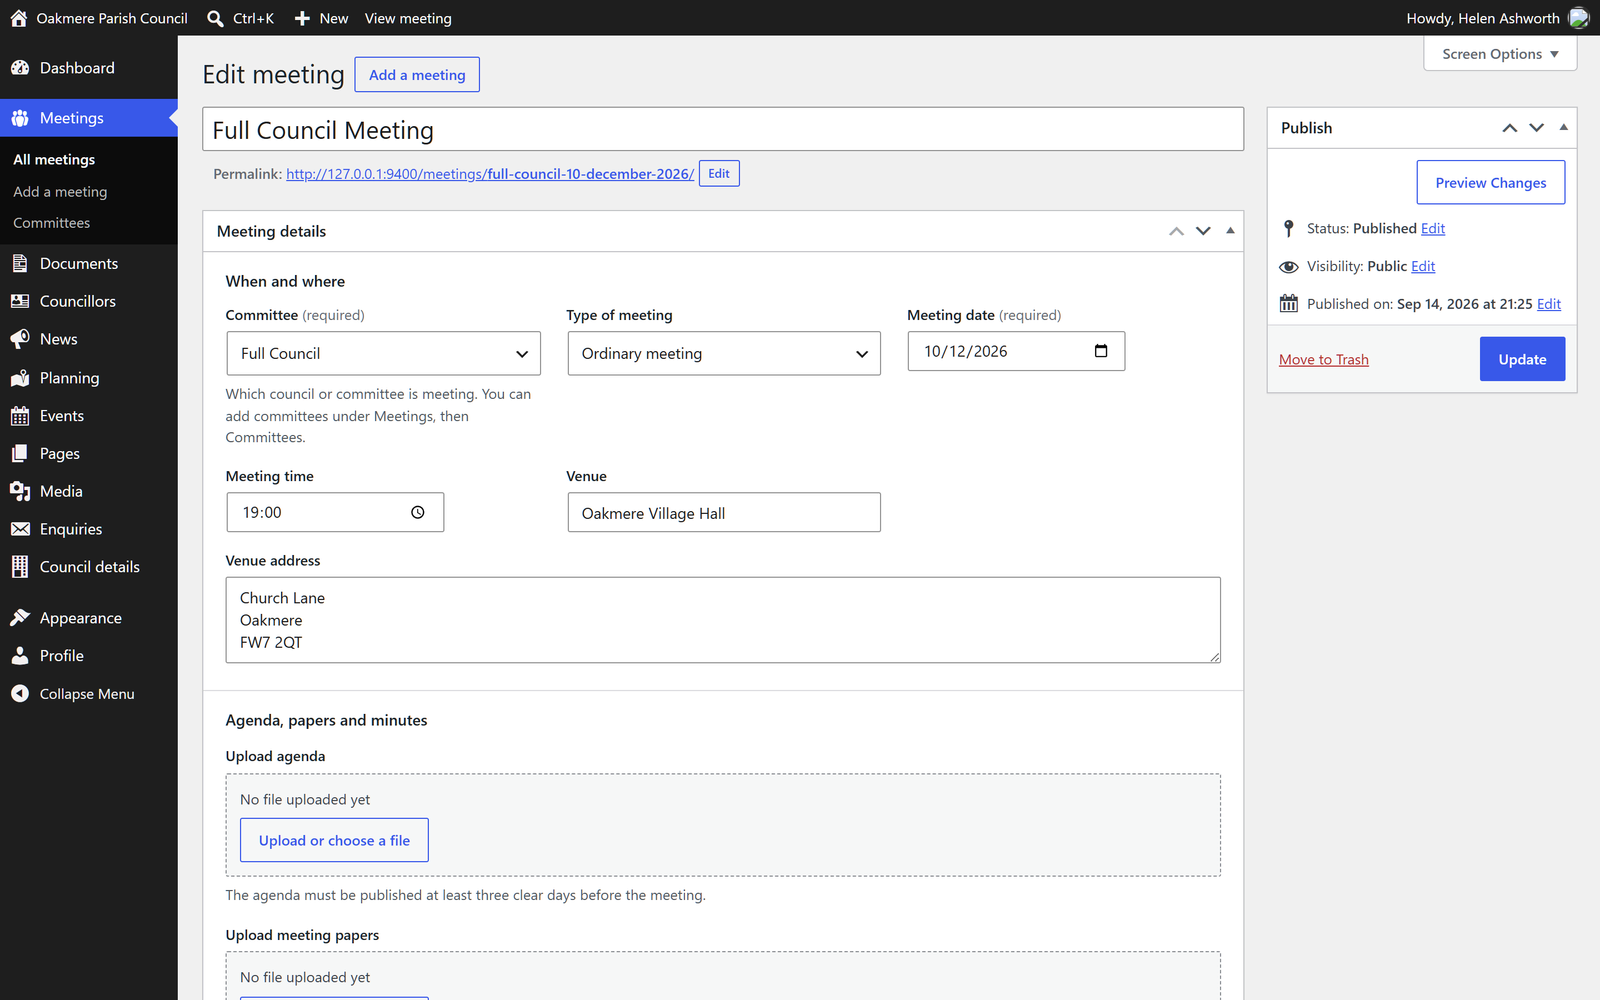
Set the new title and date, upload the agenda and add readable agenda text. Check the preview before publishing. Draft and approved minutes are labelled separately.
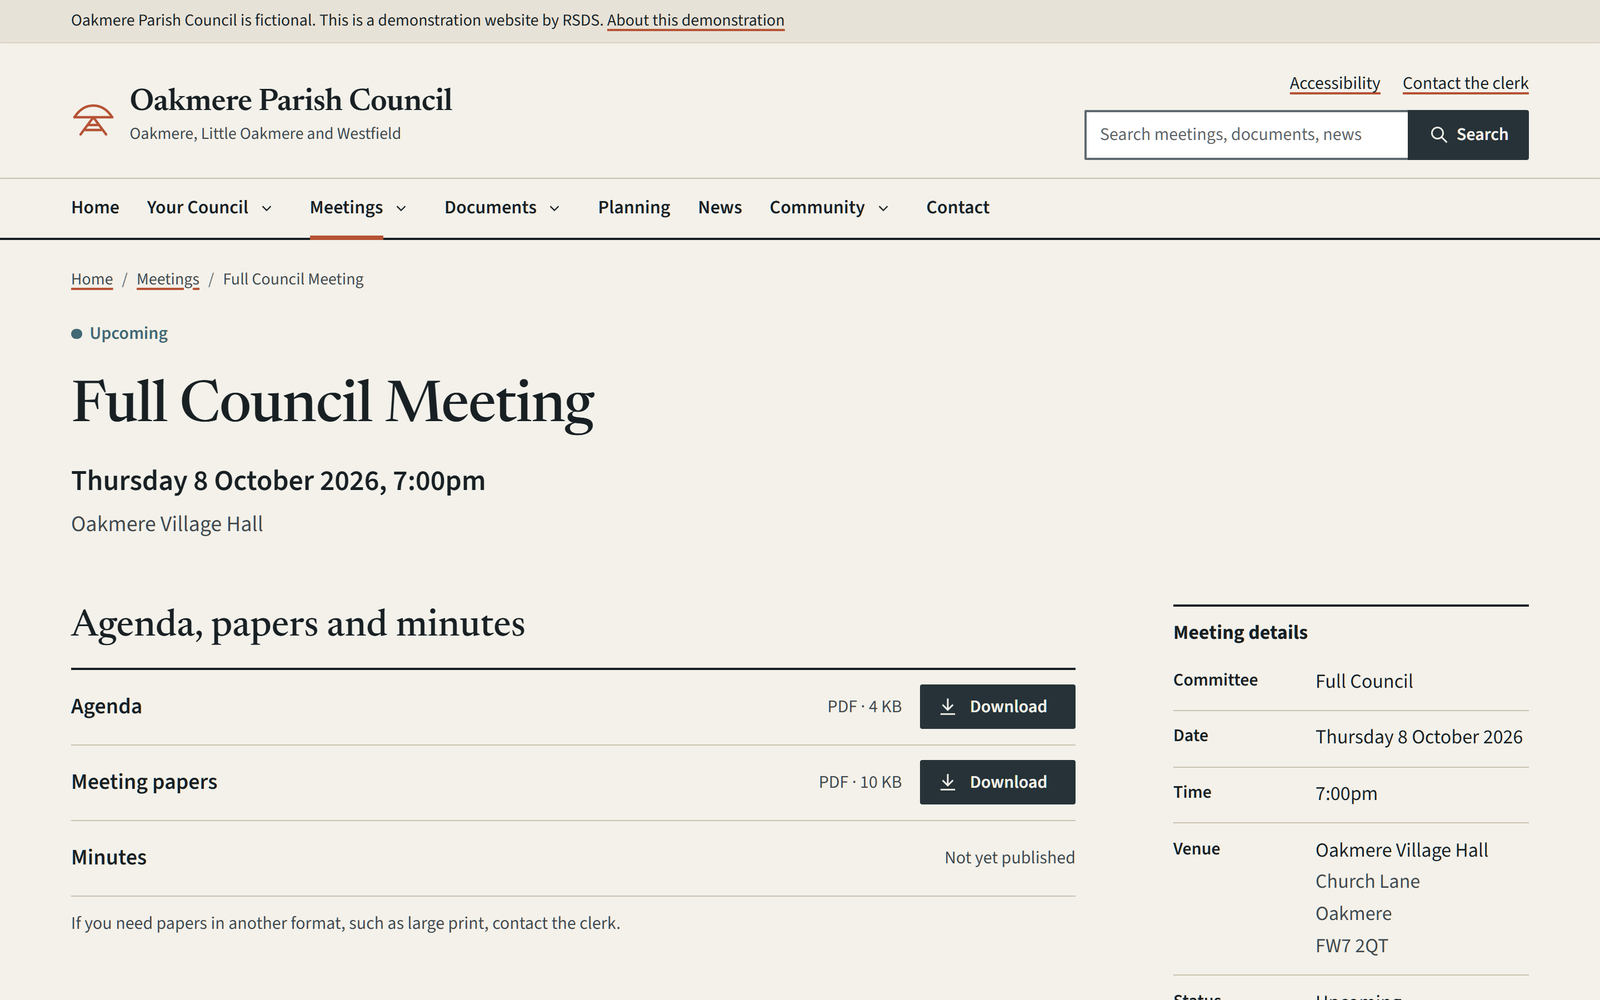
A published meeting has its own page, with date, venue, readable information and document links. It appears in the meeting archive and, when applicable, the next-meeting notice.
A guided demonstration can cover adding a meeting, uploading minutes, posting news and updating a councillor. Training for a real project is scoped around the people who will use the site.